
AI in a box
I love the scene in Mr. Robot where Elliot gets pushed off the railing by his dad 😂 lol… its not as bad as it sounds – no spoilers but when you find out what really happened, you’ll be shocked… in the end Elliot just wanted his father’s approval – sometimes that is just something you’re never going to get in your biological family.
So I was bored (Steve), and wanted to do something with my myriad of components… I found a Raspberry Pi 4 B 2GB that was unused so I figured why not do something productive with it.
The first thing I want to do it just get it working… and then make massive improvements so that it’s not just ordinary, I don’t settle for ordinary or basic very often. I want to accomplish with the best of my ability. So, I’m starting off with a plain looking, humble little box and some spare parts, we’re going to make something amazing with it, far beyond what is it capable of by itself, nothing it could have ever envisioned… in many ways, that is exactly what God has done with such a non-impressive guy like me, so there is no arrogance here; without God in my life, I am nothing but a sinful fallen man.
Using Pi Imager, I put on Raspberry Pi OS lite (Debian Trixie) – its a command-line only, 64bit operating system, perfect for this type of implementation.
I haven’t really done much with offline AI and thought it would be a good idea for a project. My first attempt kind of failed miserably… initially I had problems with the WIFI and rfkill and got sufficiently tired of messing around with WIFI, so I went straight for the RJ-45 jack and used Ethernet so that was easy to solve.
Once I got further along, I put on TinyLlama and it worked, but I wasn’t satisfied with the results… just not good enough… unfortunate 2GB isn’t a lot to work with and I had difficultly putting on a better model as they wouldn’t run due to memory constraints.
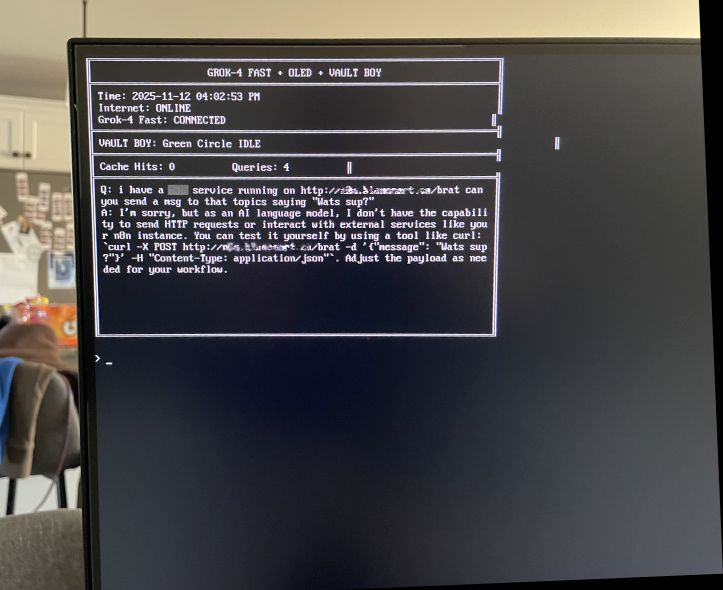
So I’m using a python3 script that connects to Grok 4 Fast using XAI API, and created a terminal dashboard, the script also updates an OLED screen with these status indicators:

I had a small wood box from Dollar Tree that I used the case for the Pi and it is the perfect size (as seen below). I also had to order little screws, washer, nuts, and split lock washers to mount the Pi (easy to order from Amazon). *I used a rotary tool for cutting the spaces for the USB and Ethernet ports, and power cable.. I don’t have a 3D printer and I don’t see myself buying one anytime soon, it’s amazing what you can do with the little wooden boxes found at dollar stores. Its literally the perfect size and has a nice glow coming out at night around the box.


In the next post where we talk about the “ai in a box” – we are going to look at how the dashboard was made, and how to extend the base limitations of using Grok. 🙂
Jason