Faxing in the modern age :)
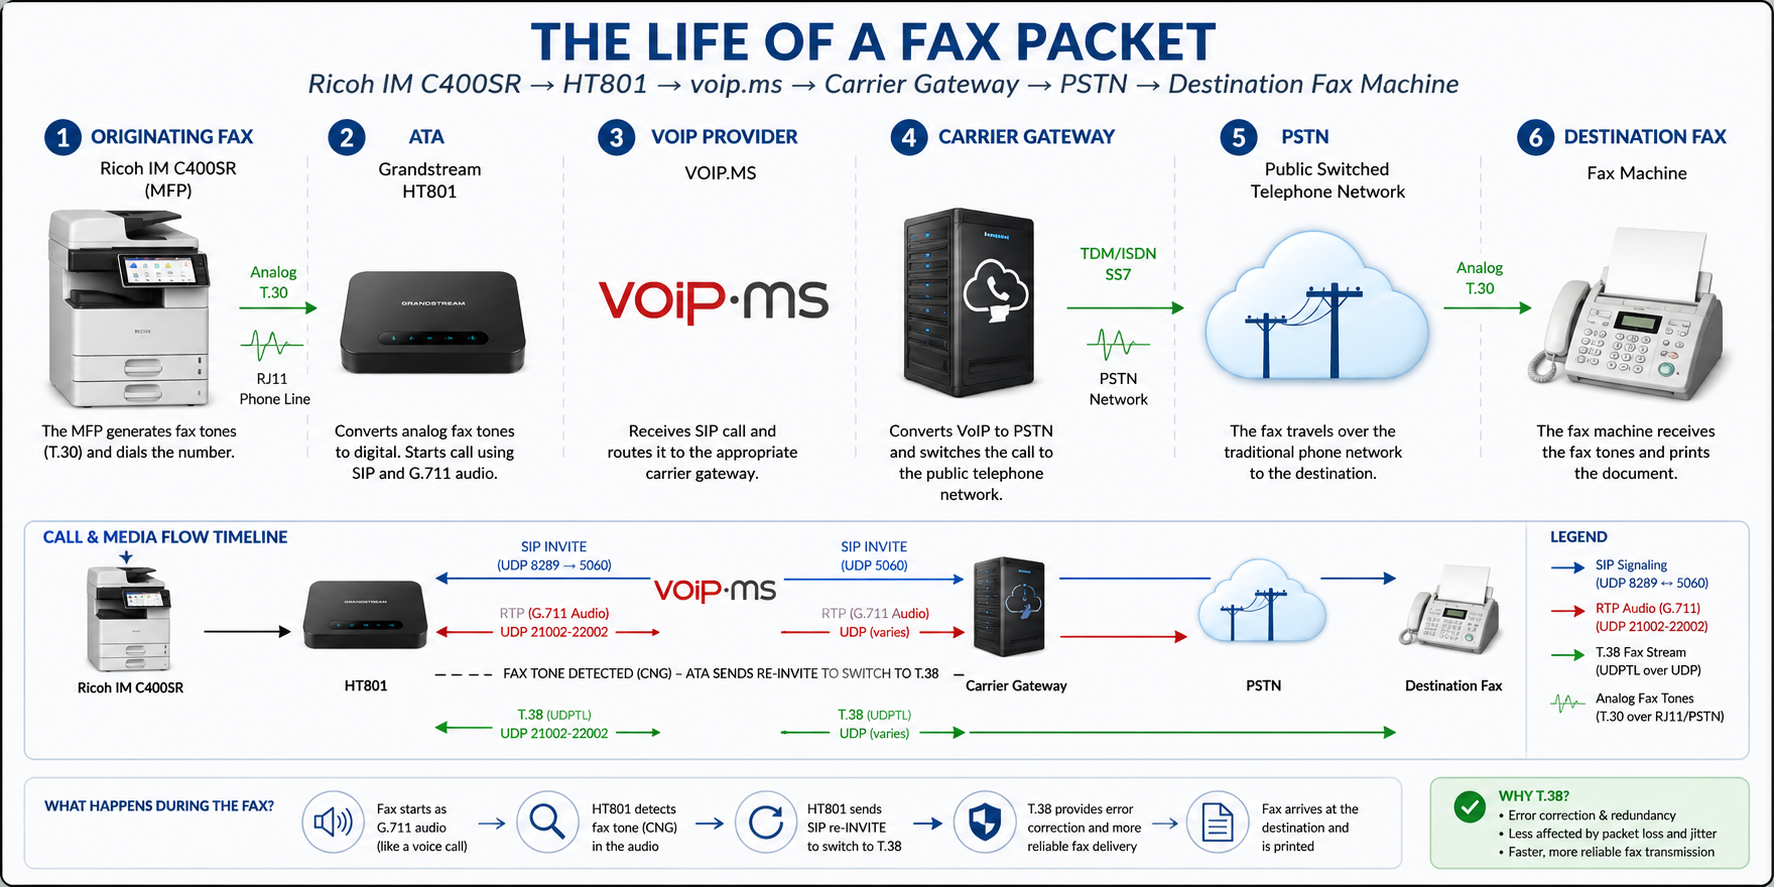
This post is going to be more technical – some people might find it boring, if you are a fan of technology then it might get interesting! Its hard to believe that in the modern age that faxing is still a thing. Most people are aware than faxing happens over a phone line but there are other ways to fax.
Analog fax lines are a little bit expensive – and depending on what you’re business requirements are, you may have an existing or new copier and it needs to be setup with a fax line.
We have multiple copiers that are fax capable and I wanted to add fax capability directly to the machine(s), but I didn’t want to pay for more analog lines from Bell MTS as they are expensive, and those machines won’t be doing a lot of faxing, just some faxing but with analog telephone lines – it doesn’t matter how much you use it, you have to pay for the line whether you use it constantly or just once a day.
I knew that we could do faxing from our copier(s) via a Grandstream HT801 ATA (analog telephone adapter), I mean how hard can it be? Well, the beauty and perhaps only saving grace of an analog line is that you connect to the copier and away you go.. but what about if you want to fax over your internet connection?
Here I will show you how we did it.. it won’t be exactly the same for everybody else, you have firewall settings specific to your own hardware, your fax provider settings (in our case VOIP.ms), and you will also need another network drop by your copier to accommodate the HT801 ATA’s network port.
I know there are other ways to fax, but we want to leverage our existing copiers and not add any app(s) in order to fax. I don’t want to individualize the whole experience as that would just add and require more administrative overhead, more documentation, and complexity – if you have staff turn over, you will constantly be chasing your tail if you make it user specific.
The return on investment here is that we only have to set this up once for each copier, and the cost of faxing is very minimal, there is no analog line, and we get to leverage our existing hardware, and the steps to send a fax stay consistent for everyone.
I’d say at minimum – your are going to want a firewall that can do port forwarding from specified IP networks (Your VOIP/Fax Provider), and I’d also recommend a network switch where you can configure a separate VLAN for devices like the HT801.
I’m going to start with the configuration of the firewall..
- Firewall Settings below …
- put ATA device on a separate secure VLAN, for us the firewall network is custom, no traffic allowed to/from any trusted network, this network is allowed to out to the internet, no WIFI – hard line only.
- setup DHCP reservation for the HT801 on the firewall
- create firewall alias for the private IP of the HT801 (used for firewall polices)
- create a SNAT (source NAT) action for Any-External –> private IP of HT801 (this will be used later for inbound traffic polices which use the ports from the custom policy templates).
- create custom policy template (packet filter) for the unique SIP port (e.g. 8289) used for HT801
- create custom policy template (packet filter) for the unique RTP port range (e.g. 21002 – 22002) used for HT801
- create an outbound SIP policy (HT801 Alias -> Public_VOIPMS_Servers for Port UDP 5060)
- *create an inbound SIP policy (Public_VOIPMS_Servers -> SNAT (AnyExternal) -> HT801 Private IP) on Port 8289
- *create an inbound RTP policy (Public_VOIPMS_Servers -> SNAT (AnyExternal) -> HT801 Private IP) on Port Range 21002-22002
- *by using a unique (signaling port (SIP:8289) & payload data (RTP:21002-22022)) and configuring that in the HT801 and firewall together – you’ve allocated a dedicated section of ports just to that device – now if you get another HT801 for a different copier, you just increment the ports e.g. SIP:8290 and RTP:22023-23023 and duplicate the existing aliases/polices/templates in the firewall and adjust for the new ports, set those same ports on the new HT801 and you have an easy way to add more ATA devices to your network.
- VOIP.MS Settings below …
- get a virtual fax phone number from VOIP.MS for your area
- create subaccount with unique username and password on VOIP.MS for the HT801 (this info is used on the HT801 below)
- configure your virtual fax number (VFN)
- VFN – Attach PDF File: Yes
- VFN – Fax to SIP: <select subaccount as created above>
- VFN – Fax to SIP Attempts: 5
- HT801 Settings below …
- set a strong password for web GUI, never use the default
- Update the HT801 to the latest firmware from Grandstream
- set time zone on HT801 to your time zone
- changed the web access mode on the HT801 to HTTPS port 443
- HT801 FXS Port Settings
- Set “Account Active”: Yes
- NAT Traversal: Keep-Alive
- Primary SIP Server: fax1.voip.ms:5060
- Failover SIP Server: fax2.voip.ms:5060
- Subaccount – SIP User ID: <enter your SIP user id>
- Subaccount – Authenticate ID: <enter your SIP user id>
- Subaccount – Authenticate Password: <enter your SIP password>
- Name (As seen in Fax): Choose desired Name
- Sip Transport: UDP
- Choose [Local SIP Port]: e.g. 8289
- Choose [Random RTP Port Range]: e.g. 21002-22002
- Check SIP User ID for incoming INVITE: Yes
- Allow Incoming SIP Messages from SIP Proxy Only: Yes
- Disable Call waiting: Yes
- Fax Mode: T.38
- Re-INVITE After Fax Tone Detected: Enabled
- Symmetric RTP: Yes
- Re-Invite Upon CNG Count: 1
- Jitter Buffer Type: Adaptive
- Jitter Buffer Length: High
- Select Update & apply on HT801
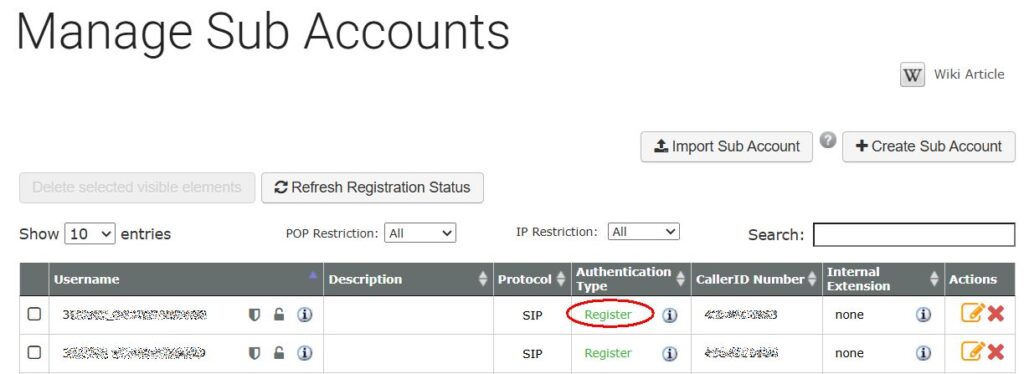
Now its time to do some testing.. If you look in your VOIP.MS (or similar provider) portal – you should see the SIP subaccount has registered. As you can see in the screenshot below – both SIP subaccounts have registered.
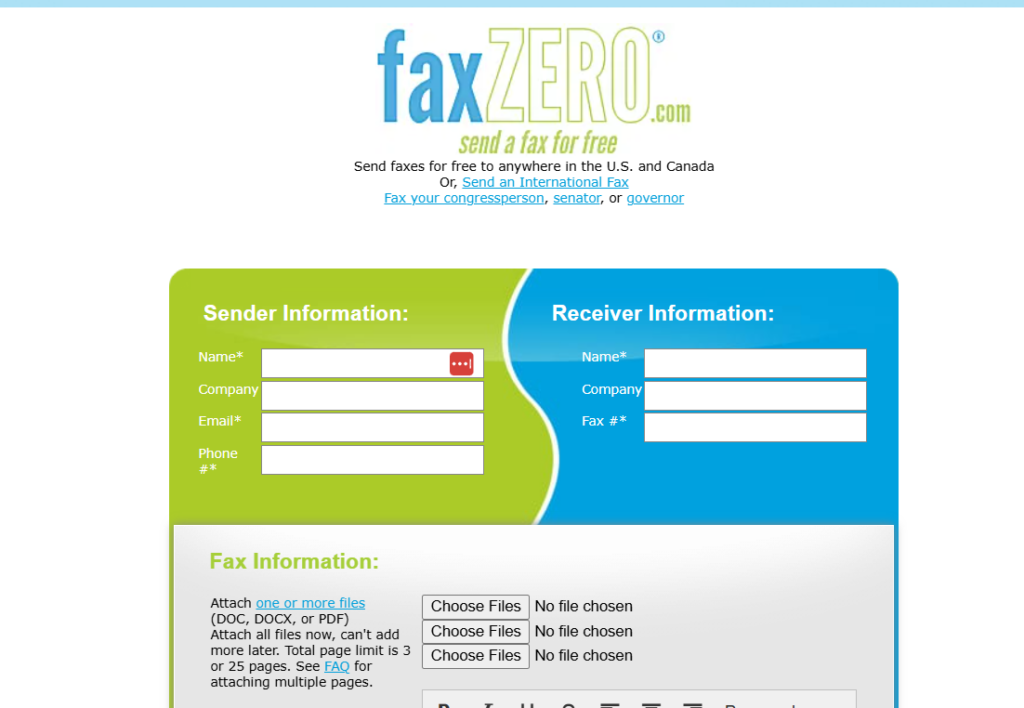
For sending test faxes, I’d recommend Faxzero. They has a status page that lets you monitor the delivery to your fax machine.
Thanks,
Jason